
Setting up Remote Access VPN for Firepower Threat Defense
Remote Access VPN (RA VPN) is available in Firepower Threat Defense (FTD) 6.2.1 for 2100 Platforms. For all other Platforms it will be supported on version 6.2.2.
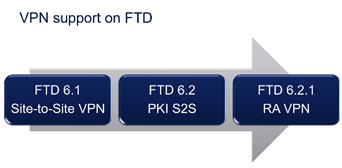
Figure 1
Features:
- RA VPN Client software is AnyConnect 4.x available for Windows, Mac, Linux, Andorid and iOS.
- Protocols supported are SSL and IPSec IKEv2.
- Authentication methods are LDAP/AD, RADIUS and Client Cert and Cert + AAA.
- Authorization using RADIUS Attributes.
- Accounting via RADIUS.
- Availability methods are FTD-HA, Dual ISP, Multi AAA
- RA policy can be shared across multiple devices.
- Supported on Firepower Management Center (FMC) and Firepower Device Manager (FDM).
- Monitoring tools for User Activity and Active Sessions and Troubleshooting tools such as Packet Tracer for connection issues.
- Easy Wizard for configuration.
Configuration Steps:
Go to Devices Menu — VPN — Remote Access – Wizard:
- Step 1: Define Name and Protocol (SSL, IPSEC-IKEv2).
- Targeted devices: it is possible to select more than one.
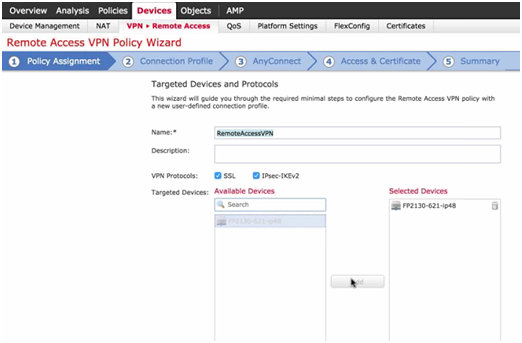
Figure 2
- Targeted devices: it is possible to select more than one.
- Step 2: Choose Authentication method.
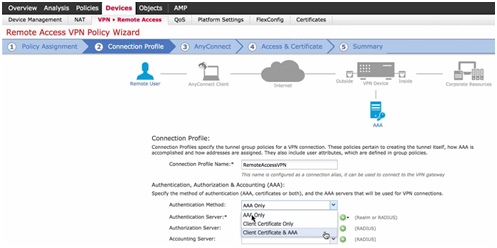
Figure 3
- Authentication server (Cisco ISE or AD) – Cisco ISE option defines an object group for RADIUS.
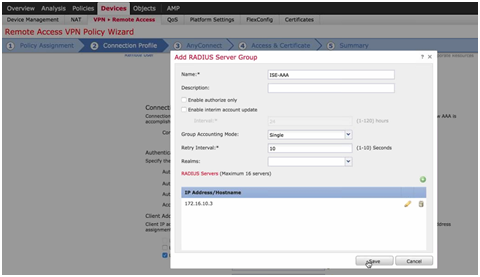
Figure 4
- Client IP address: AAA Server (RADIUS), DHCP or IP Pool.
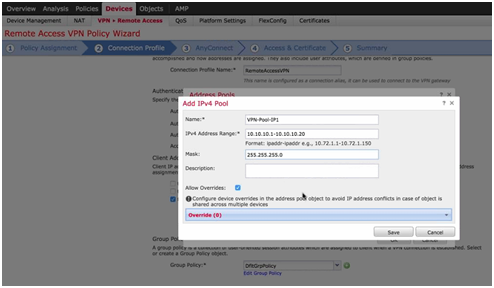
Figure 5
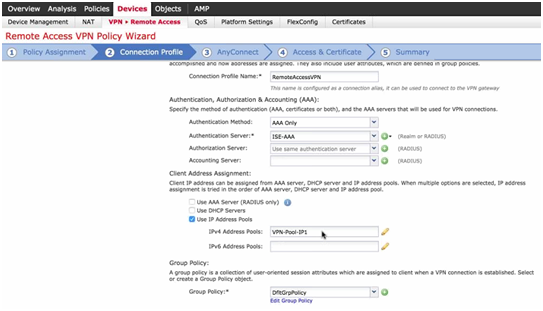
Figure 6
- Select Group Policy – General Tag: Create an Access List (ACL) to define interesting traffic to go through the tunnel (For example: allow any traffic to 172.16.10.0/24 where my internal servers are) and select option IPv4 Split Tunneling: Tunnel networks specified below. Any other traffic not destined to 172.16.10.0/24 will not traverse the tunnel and will follow the default exit path to the Internet.
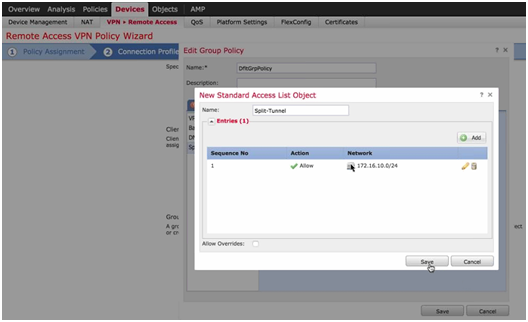
Figure 7
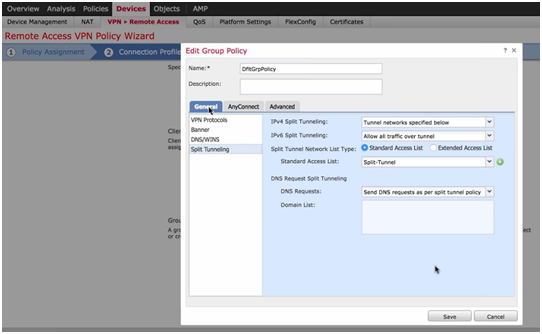
Figure 8
- AnyConnect Tag: AnyConnect File – Choose AnyConnect XML profile.
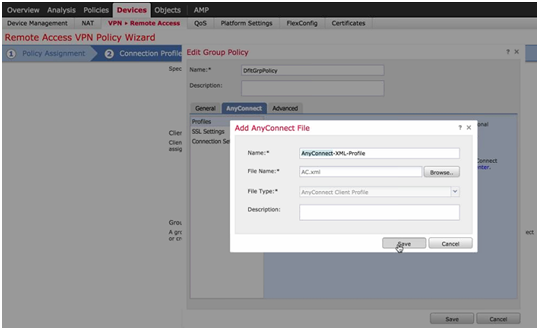
Figure 9
- Authentication server (Cisco ISE or AD) – Cisco ISE option defines an object group for RADIUS.
- Step 3: Select the AnyConnect Image for the OS supported (Windows, Linux, etc…).
- Step 4: Access and Certificate.
- Select Interface (Outside-Zone): It is possible to select multiple interfaces where you want to apply the RA Policy.
- Device Certificate: Specify a Name and the Certificate can be imported manually or using Simple Certificate Enrollment Protocol (SCEP).
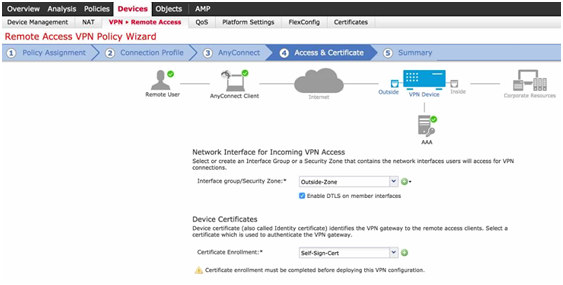
Figure 10
- Step 5: Summary.
- A diagram is displayed to show where the policies have been configured and if they have been completed.
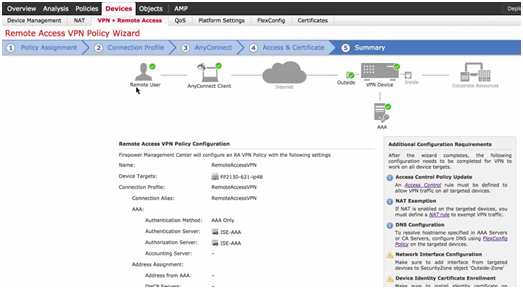
Figure 11
- A diagram is displayed to show where the policies have been configured and if they have been completed.
Further Configuration Requirements:
Once the Wizard is completed, the following configuration requirements need to be done for RA VPN to work on all device targets:
- Access Control Policy Update: An Access Control rule must be defined to allow VPN traffic on all targeted devices.
- Policies Menu – Access Control – Edit:
- New Group Policy: Specify a name, for example: Allow-RA-VPN-Traffic.
- Zones:
- Source: Outside Zone.
- Destination: Inside Zone.
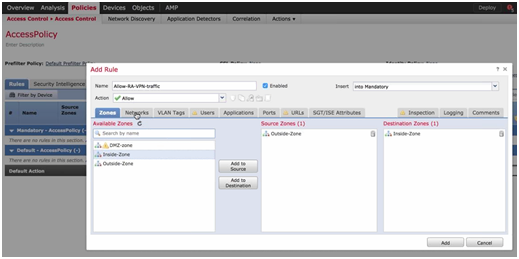
Figure 12
- Zones:
- New Group Policy: Specify a name, for example: Allow-RA-VPN-Traffic.
- Networks:
- Source Network: Select Source IP Addresses. For example a VPN Pool if it has been previously defined.
- Destination Networks: Select the Inside Network.

Figure 13
- Add any other extra configuration in case it is needed
- Policies Menu – Access Control – Edit:
- Device Certificates: Configure the Certificate of the device.
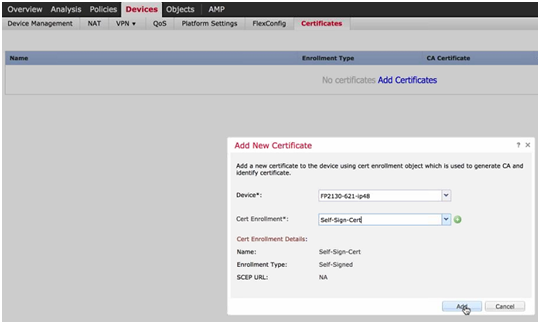
Figure 14
- NAT Exemption: If NAT is enabled on the targeted devices, you must define a NAT rule to exempt VPN traffic.
- Devices Menu – NAT:
- Configure NAT exemption if Outside to Inside NAT or Inside to Outside NAT is required.
- Devices Menu – NAT:
- DNS Configuration: is needed in order to resolve the hostname specified in AAA Servers or CA Servers. Configure DNS using FlexConfig Policy on the targeted devices.
- AnyConnect License is required.
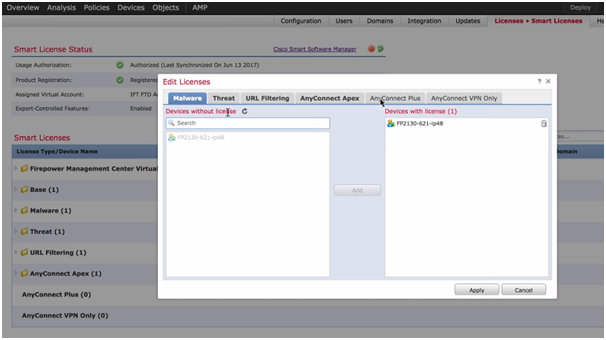
Figure 15
- Finally deploy the Policy to the device.
Client Connection:
Clients can use a web browser to connect to the Outside interface of the device. Once they login, the AnyConnect image is automatically downloaded or updated. After that, clients can connect using the AnyConnect software installed on their device, which already has the AnyConnect XML profile with all the parameters for the RA VPN connection.
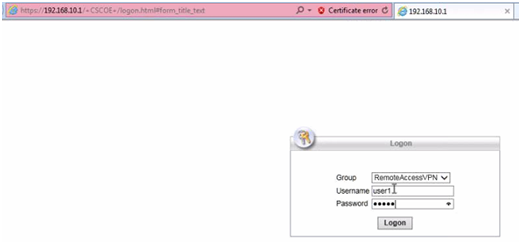
Figure 16
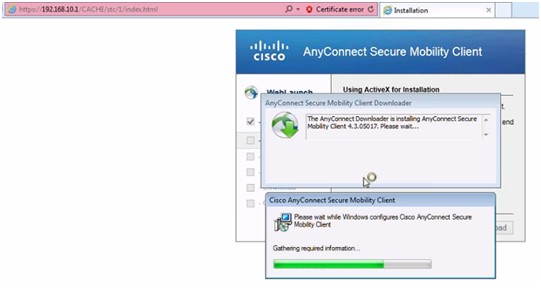
Figure 17
RA VPN Monitoring and Troubleshooting:
- SSH to FTD IP Address and execute “show vpn-sessiondb detail anyconnect” to check established VPN connections.
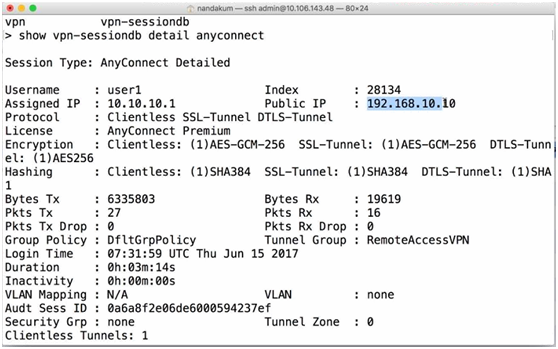
Figure 18
- GUI interface: Go to Analysis Menu – Users – Active Sessions:
- User Activity.
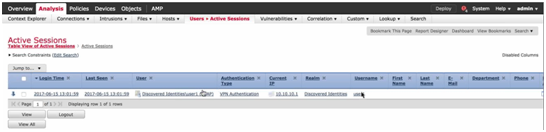
Figure 19
- Dashboard – VPN.
- User Activity.
- Troubleshooting:
- Devices Menu – VPN – Troubleshooting: Syslog.
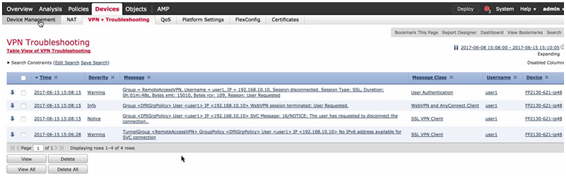
Figure 20
- Devices Menu – Device Management – Troubleshooting icon next to the Policy – Advance Troubleshooting: Packet Tracer and Captures
- Devices Menu – VPN – Troubleshooting: Syslog.
References:
https://cisco.webex.com/cmp3200/webcomponents/jsp/docshow/closewindow.jsp